Tips for Handling Firmware#
Uploading firmware to an AREDN® node is usually a straightforward process. Follow the procedures documented in the Downloading AREDN® Firmware section to ensure you have the correct firmware version from the AREDN® website to install on your node. If you experience issues uploading firmware, the following tips may be helpful.
- Web browser cache and sessions
One issue can occur when installing firmware using a web browser. Your computer’s browser cache stores data for the URLs that have been visited, but IP addresses and other parameters may change during the install process. It is possible for the cache to contain information that doesn’t match the latest settings for the URL, so the browser may block the connection. Clearing your computer’s web browser cache will allow the latest URL settings to be registered so you can continue with the install process. During AREDN® firmware installs you can usually resolve a the issue with one or more of the following things:
Refresh or Reload the URL for your node.
Clear your browser cache and delete cookies.
Close your browser and restart a new session.
Use a different web browser program or a Safe Mode / Incognito browser window.
Unplug and reconnect the Ethernet cable from your computer to ensure that your machine has received a new DHCP IP address on the same subnet as the node’s updated IP.
- PXE Server
If you are using a PXE server to provide your device with an IP address and a new firmware image, be sure to allow the PXE server through your computer’s firewall. If the PXE server does not display any activity when you begin your firmware install, check your firewall settings. On the Windows control panel, for example, click Advanced Settings and look through the “Inbound Rules” to see if a rule exists for the PXE server. If a rule exists, make sure to “allow connection” for both private and public networks. If no rule exists, create a new rule allowing connection for both public and private networks.
Tips for Upgrading Firmware#
Upgrading an AREDN® node is accomplished on the Firmware page. Follow the procedures documented in the Downloading AREDN® Firmware section to ensure you have the correct firmware version from the AREDN® website to install on your node. In rare cases the upgrade process may fail due to lack of node resources, but such a failure will leave the node running its previous firmware version.
- Try to Sideload Firmware
The Sideload Firmware option is described in the Node Admin guide. This involves using a file copy utility on your computer to copy the firmware file to a specific directory and filename on your node. Once the new firmware file is available on the node, you can click the Update button to start the install process.
Attention
If you try to initiate a firmware install from your node’s command line, do not use the legacy OpenWRT
sysupgradeutility. That no longer accomplishes all of the correct steps to flash an AREDN® node. Instead you must use/usr/local/bin/aredn_sysupgradeto install a local firmware image from your node’s command line.
Tips for Downgrading Firmware#
Downgrading AREDN® firmware is typically accomplished using the same procedure as for uploading firmware to your node. You are simply uploading a previous version of the firmware rather than the latest version. If you are downgrading firmware on a node which previously used a different target architecture (ar71xx vs. ath79), you will need to do a fresh First Install using the appropriate firmware for that device.
Use the AREDN® Firmware Selector to download the previous release’s install files. For example, if your Ubiquiti Rocket M5 XW is currently running version 3.23.4.0, then download the files required for release 3.22.12.0 (as shown below).
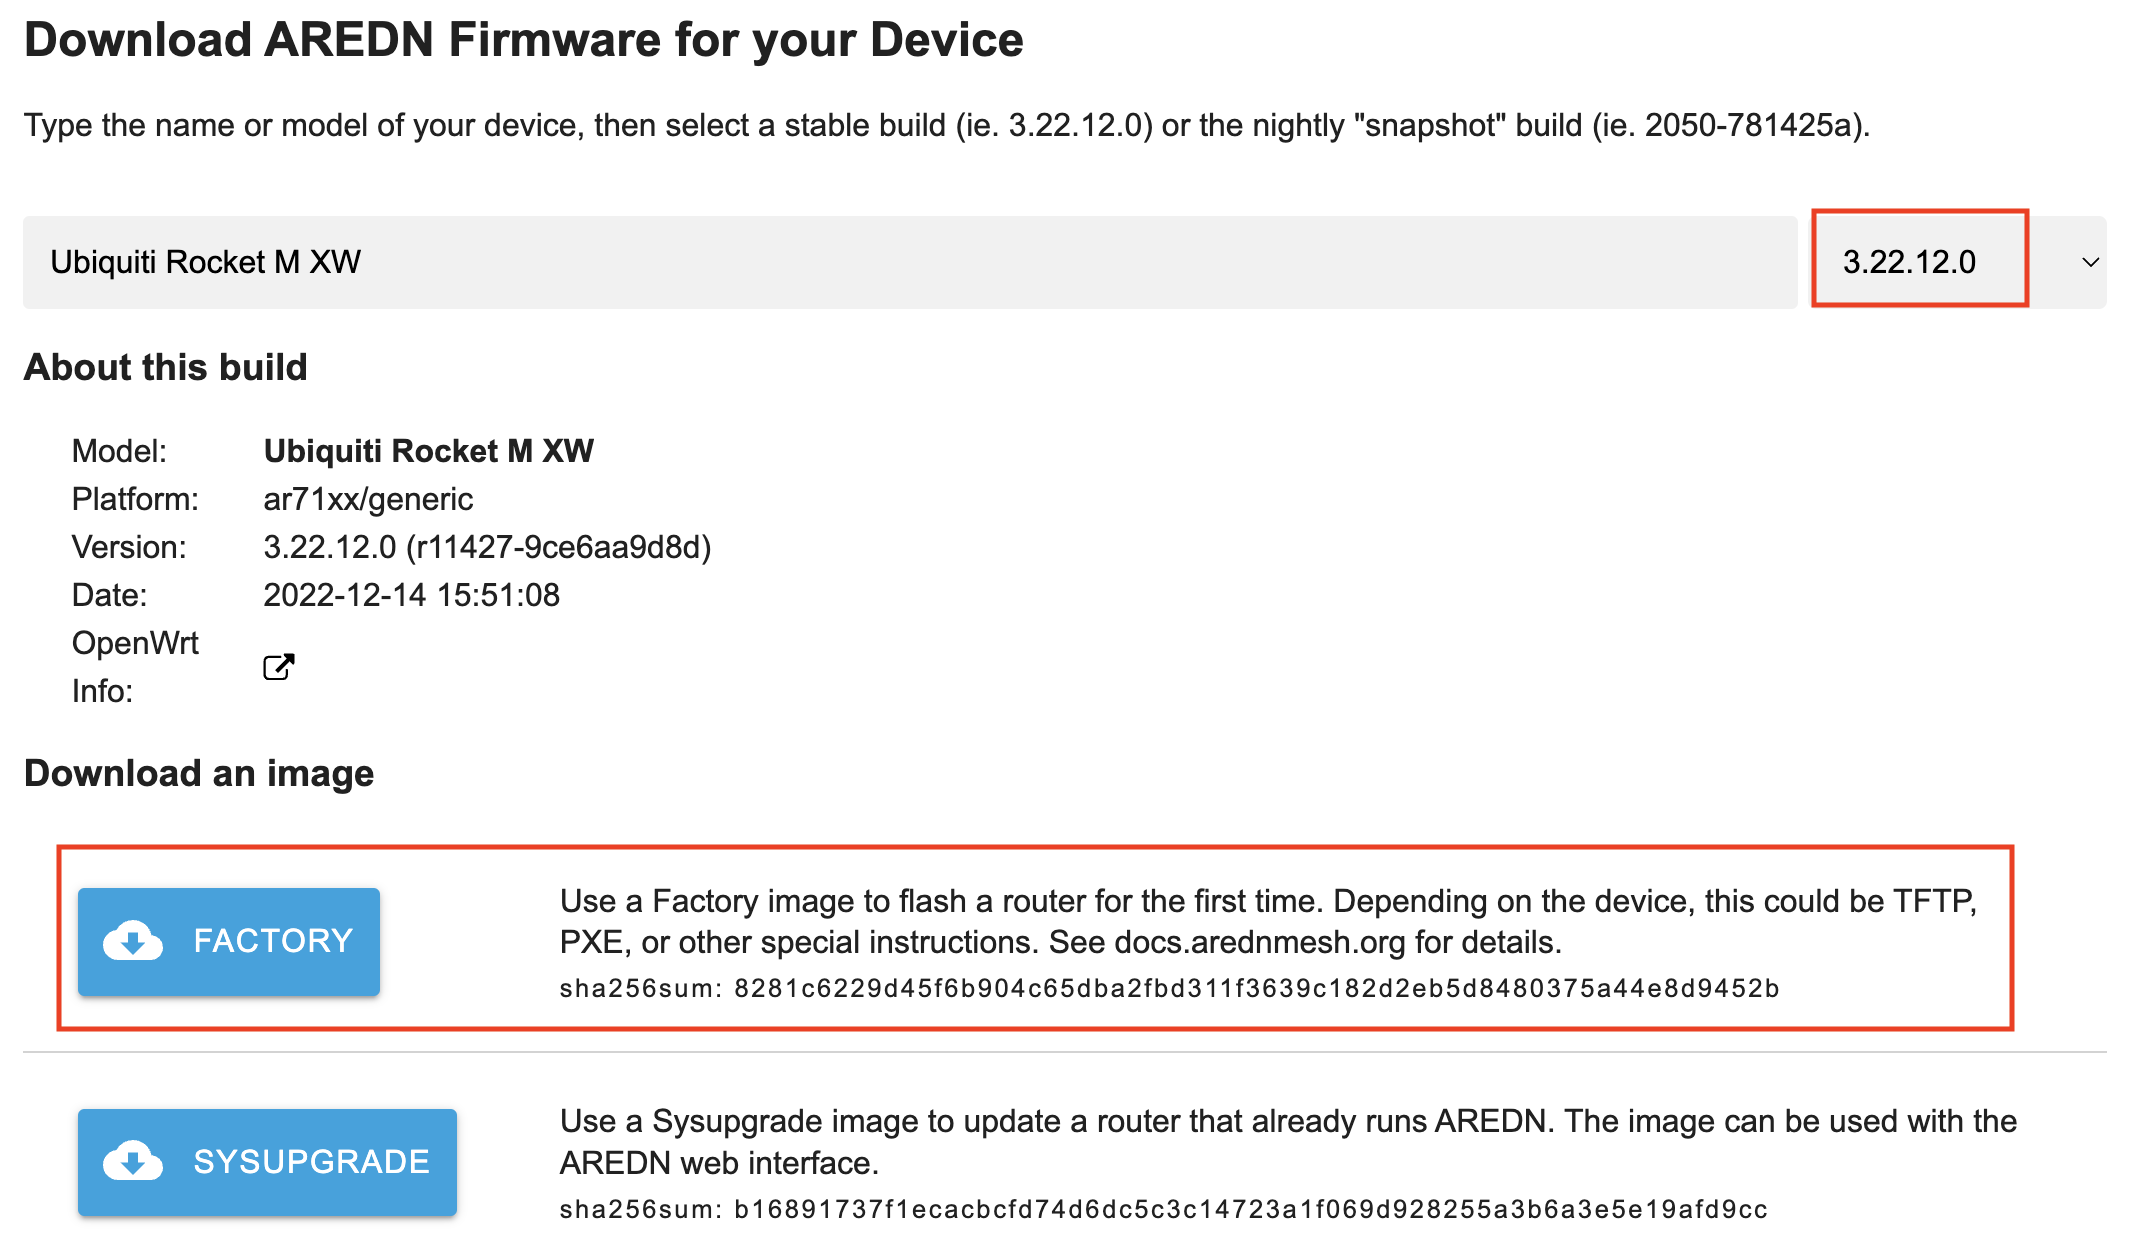
To do a fresh install of the firmware, review the Installing AREDN® Firmware documentation and follow the steps for the install procedure that is appropriate for your node model.
For Ubiquiti and TP-LINK models you will be uploading the FACTORY firmware.
For Mikrotik models you will boot using the KERNEL file (which you rename to rb.elf) and then immediately apply the SYSUPGRADE firmware image.
For GL.iNet devices you will use the recovery procedure to upload the SYSUPGRADE firmware image.
After downgrading your node’s firmware you will then continue the process for entering your callsign and configuring the node’s settings.